

Want your content to stand out by creating thumb-stopping graphics in the blink of an eye? If so, you might want read this review of BrandBird.
If you create content, share your work on social media, or #buildinpublic, you’ll know how difficult it is to make your posts look nice.
Even if what you’re sharing is absolute fire, it’s hard to get people to stop and pay attention.
No one wants to look at a wall of text or an awkwardly-cropped screenshot.
The best way to make your content stand out and grab someone’s attention is to add nice visuals.
There’s one little problem though…
Creating beautiful graphics is hard.
And even if you’re already a good graphic designer, you still need the time.
Heck, I’ve been designing websites for 15+ years and creating graphics for my blog articles or social media posts is still a pain in the butt.
You need to figure out the proper dimensions of your image, grab a screenshot, crop your screenshot, give it some rounded corners, add a shadow, add a background to your image etc.
It’s a lot of tinkering needed just to create a simple image.
Not to mention the mess of files you have in Figma or Photoshop because you’re trying to create these as quickly as possible.
That’s until I discovered BrandBird Studio.
After using it for a few months now, I can say it’s really sped up my content creation process.
In this BrandBird review, I’m going to cover what it is exactly, who it’s for, how it works, and whether or not I’d recommend it.
Make sure to stick around to the end, because I might also have a special coupon code for the NewPulse faithful 🙂
Important Note: I personally use BrandBird, and this review is in no way sponsored or paid for by the product creator. Some links may be affiliate links, should you want to buy the product. There’s no extra cost for you – it’s just a little way you can help support us. You can read about our affiliate promise here.
🐦 What is BrandBird?
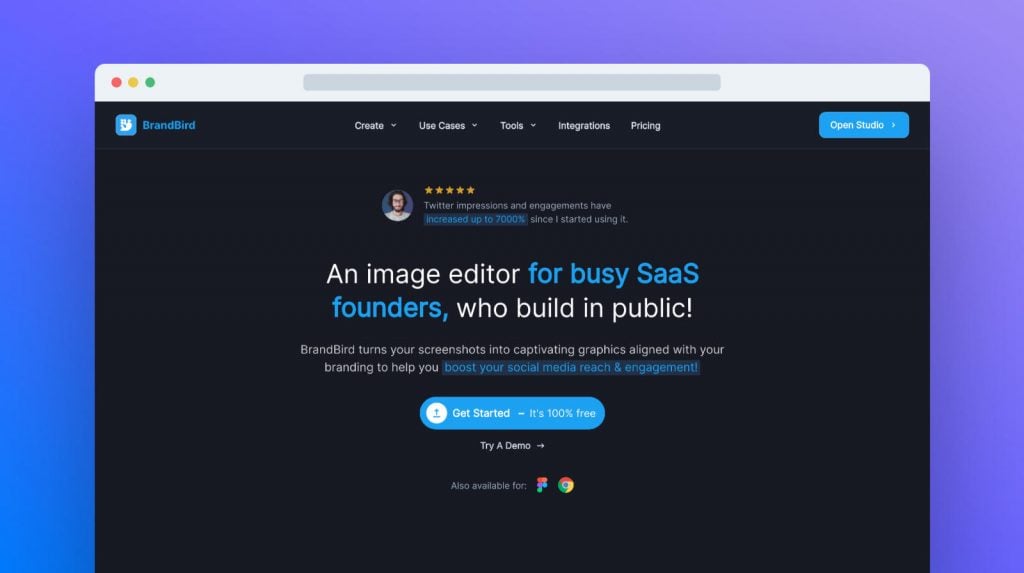
BrandBird is a web-based image editor that makes it super easy to turn boring screenshots into beautiful graphics that you can use in your content or social media posts.
With a simple interface, you can quickly add your screenshots and adjust the styling to create a completely custom design.
There are also a lot of presets & templates to choose from, which means you can have a professional-looking graphic ready to share in seconds.
BrandBird was created by Jim Raptis, who’s made a name for himself for creating simple products that allow you to create better designs.
Some of his other products include MagicPattern, Phigma, and The Launch Checklist.
🧑💻 Who is BrandBird for?
There are a few different use cases that BrandBird works really well for:
I’ve been using it in my The Lab Report newsletter, and it really makes each newsletter issue pop.
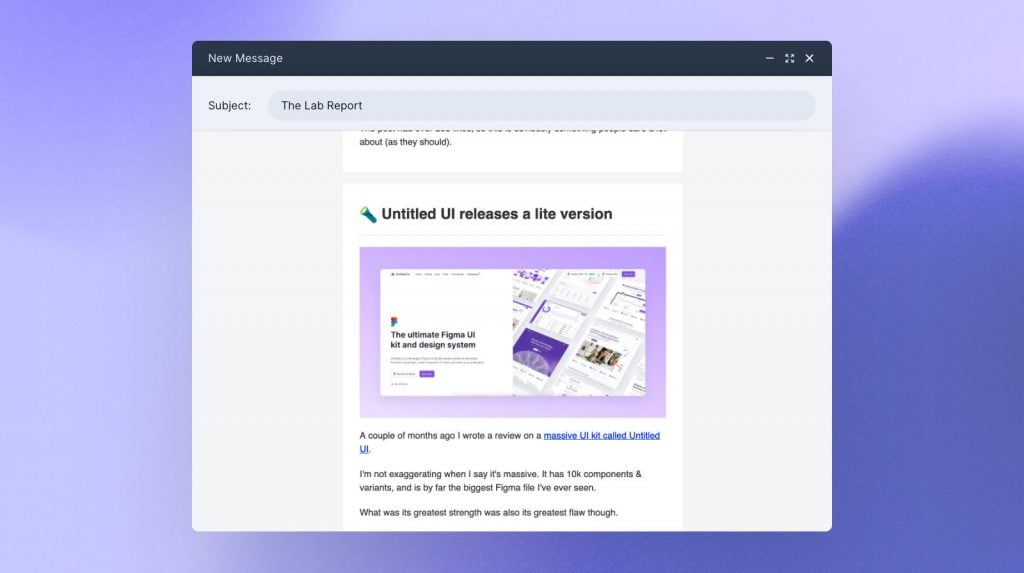
I’ve also been using it in my product review posts.
Like the one you’re reading right now 👀
🌓 How is BrandBird different?
You might be thinking: another image editor? Cool, I don’t need that.
Those were honestly my first thoughts when I came across BrandBird.
I use Figma, Photoshop, Affinity Designer, Canva etc. already – why would I need another graphic design tool?
After giving it a shot, the answer quickly became clear.
BrandBird was built to solve a specific problem.
It’s not an all-you-can-eat graphic design tool.
It does one thing, and it does it well (making boring screenshots look amazing).
It simplifies the process and cuts out everything you don’t need.
There’s no dealing with frames, layers, artboards, or cropping.
You just click and go.
💪 The Benefits of Creating Nice Graphics
Creating graphics can be a time consuming process, but it’s worth it to have well-designed visuals to accompany your content.
🎨 How BrandBird Works
Getting Started
Getting started with BrandBird is quick and easy.
Once you’re in the editor, you’ll first want to select your canvas size.
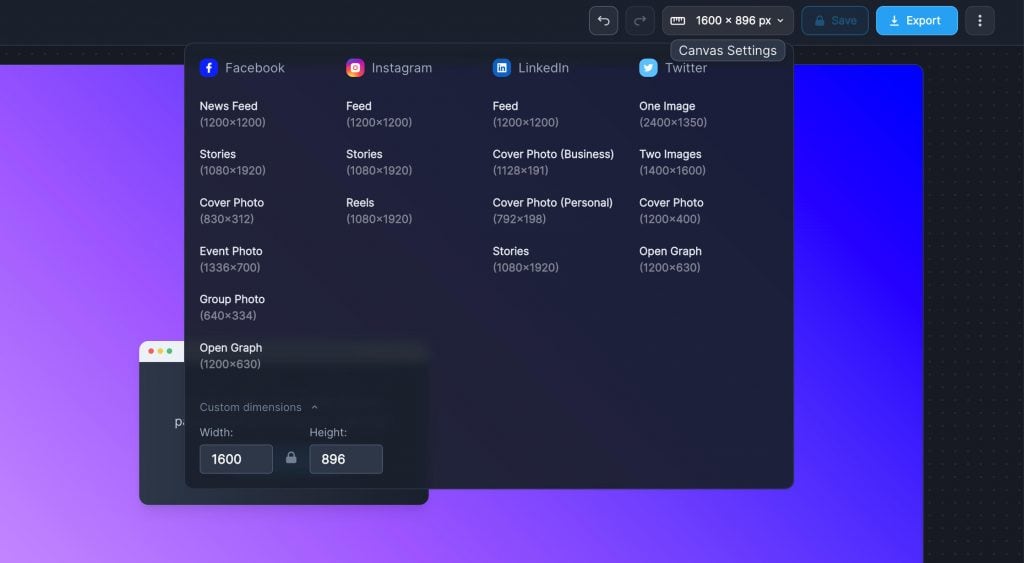
You can choose from the most popular social media image dimensions (no need to Google the Instagram Stories dimensions for the 1000th time), or input your own height & width.
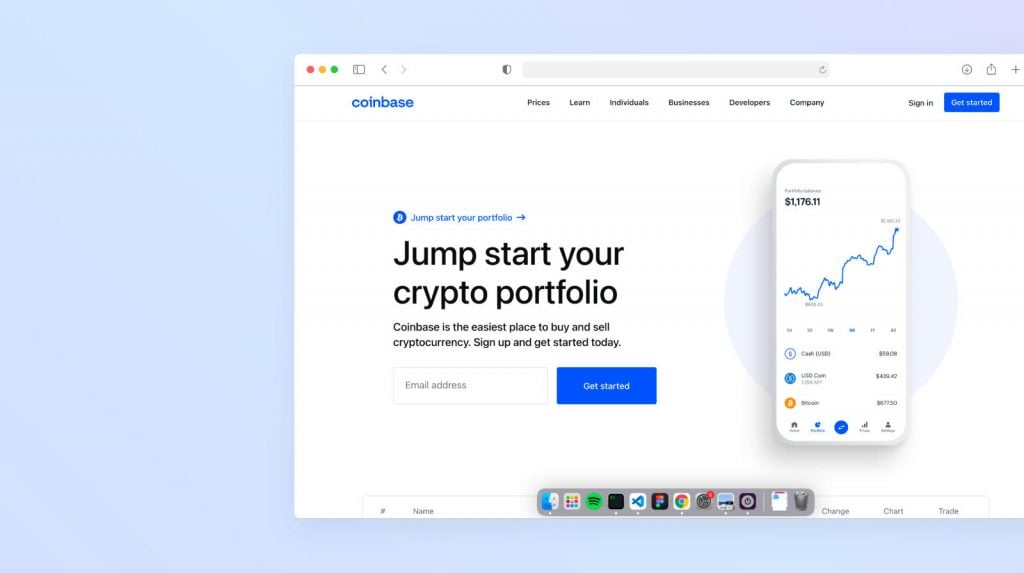
Now that you have your canvas, it’s time to add an image.
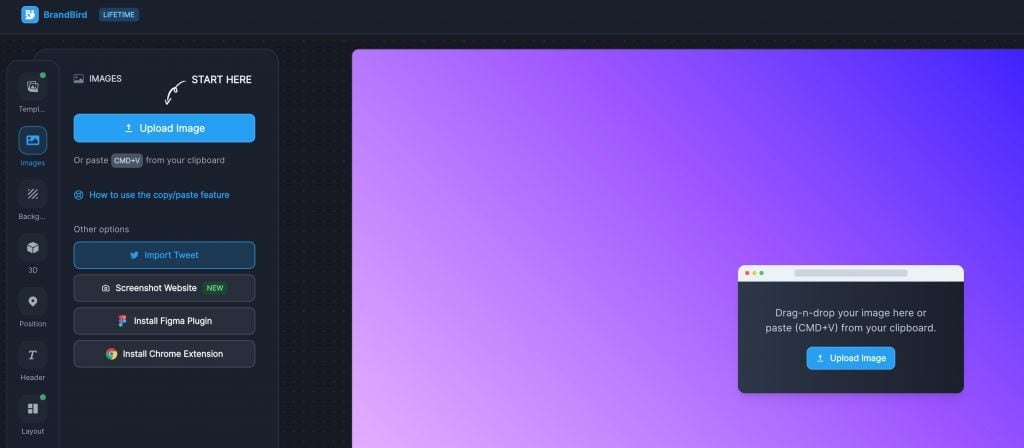
You can choose to copy + paste an image, upload an image, input a website URL, or input a tweet URL.
(For those last two, it’ll automatically grab a screenshot which is cool!).
You may need to adjust the scale if you want to make your image smaller or larger.
If you wanted to, you could actually just stop here.
With the default settings, you already have a great looking image that you can add to your blog or share on social media.
Position Your Image
Changing the position of your image can give it a different look and feel.
I usually start from the bottom and then play around with it.
That gives you the ability to create an image like this:
Or have something more on the side like this:
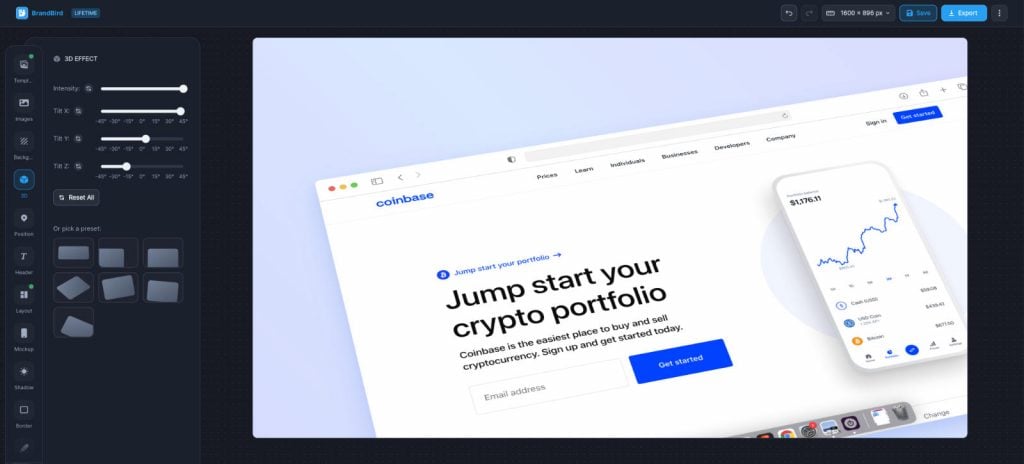
Add a 3D Effect
Want to add more pizzazz to your image? You can skew it on the X, Y or Z axis to give it a 3D effect:
Add a Mockup
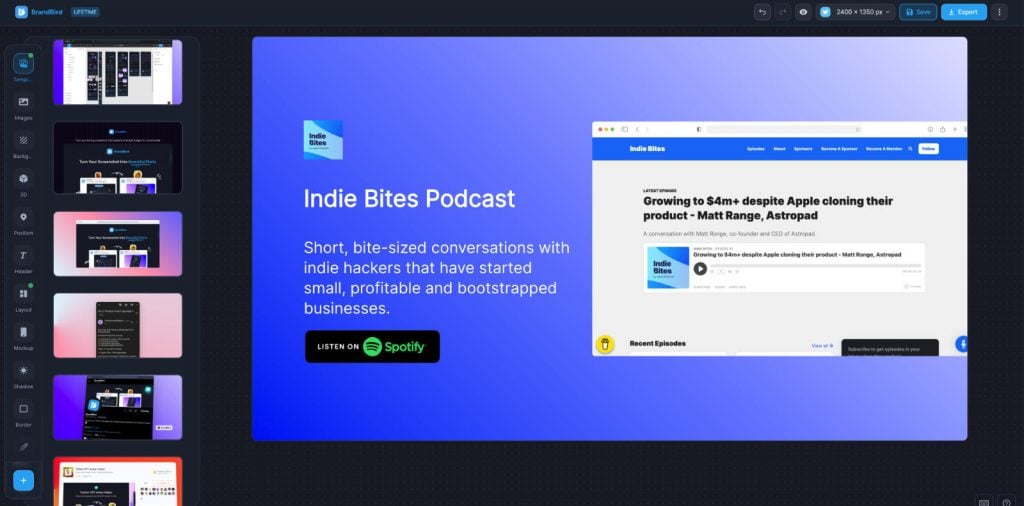
Choosing a mockup frame will give more context to the image you’re sharing.
If it’s a screenshot of a web page, you can give it a minimal-looking browser frame.
Maybe it’s a screenshot of an email campaign you received? You can add an email frame, and even adjust the header information that’s shown.
There are a bunch of other options, like a mobile device mockup, MacBook mockup and more:

Add a Background
Your background will drastically change the feel of your image.
You can choose to use a solid color background, gradient, pattern, or image.
One of the best features of BrandBird is how many presets it already has built-in.
There are a bunch of gradient backgrounds in the library, so I usually find a style I like and make some minor tweaks to match the colors of my image.
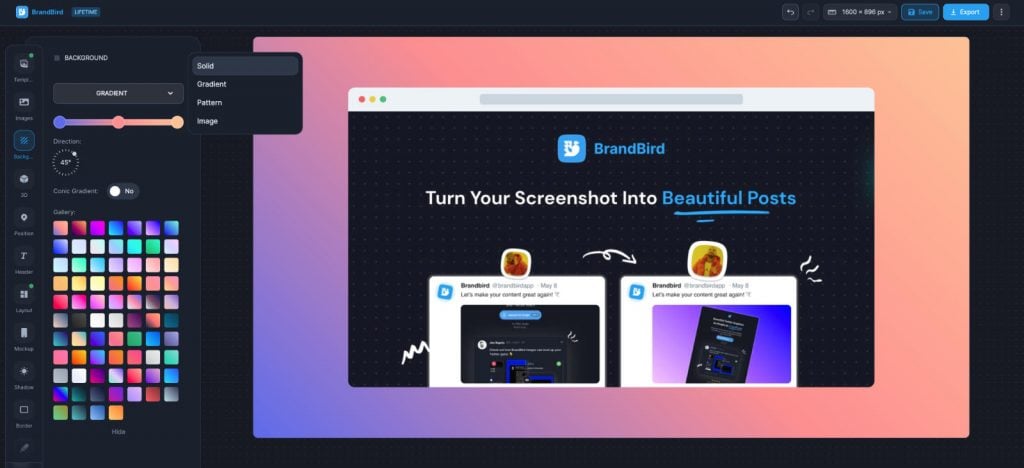
This saves a lot of time compared to creating a gradient from scratch.
Adding Annotations
Adding annotations is simple and you have a lot of options to choose from.
You can add text, shapes, arrows, numbers, emojis, and even popular badges (like the Apple App Store).
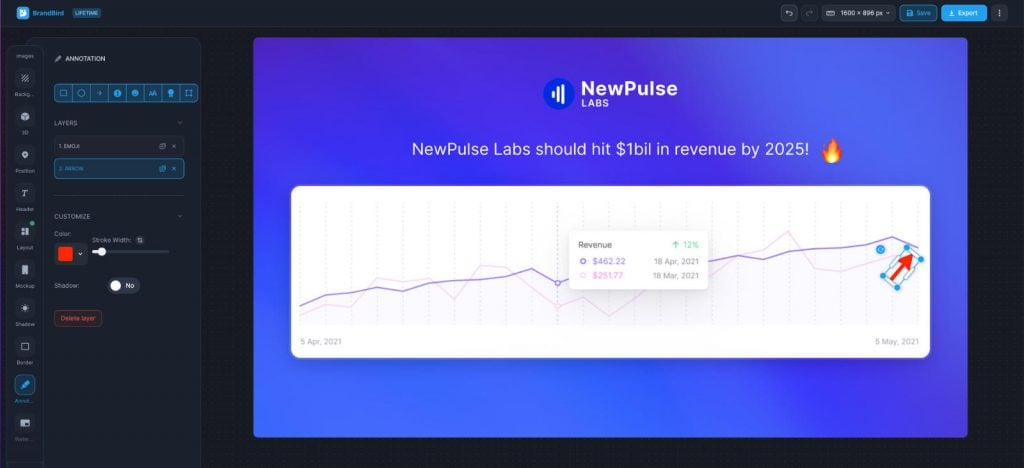
Each of these come with their own style settings.
You can choose your fonts, colors, size, alignment etc.
Ready For Export
Once you’re happy with your design, you can simply copy it to your clipboard or download it as a PNG or JPG file.
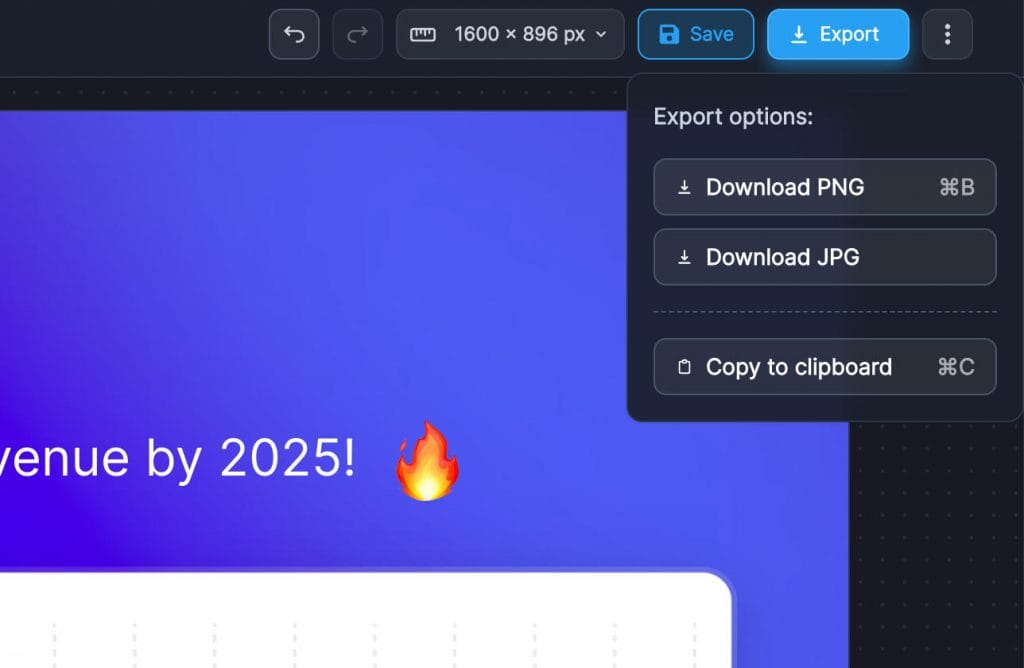
And that’s it!
Just insert your image into your post and you’re ready to go.
🧱 Using Templates
BrandBird conveniently comes with a bunch of different templates you can start your design with.
Again, this just makes the whole process incredibly simple.
All you need to do is paste your image and you have a graphic like this ready in 3 seconds flat:
For brand consistency, you’re also able to save your own templates.
Once you have a look that works well for your brand, you can save it as a template and use it over and over again.
That way your images will always be recognizable and you won’t have to worry about going to your brand style guide to select the right colors each time.
☎️ Support & Service
Support in my experience so far has been excellent.
I’ve raised a couple minor bugs, and Jim addressed them quickly.
Should you need help with anything, they have a knowledgebase built right into the app, as well as a number of tutorials to help you get started.
If you still need to contact them, you can contact BrandBird from their contact page.
💵 Pricing
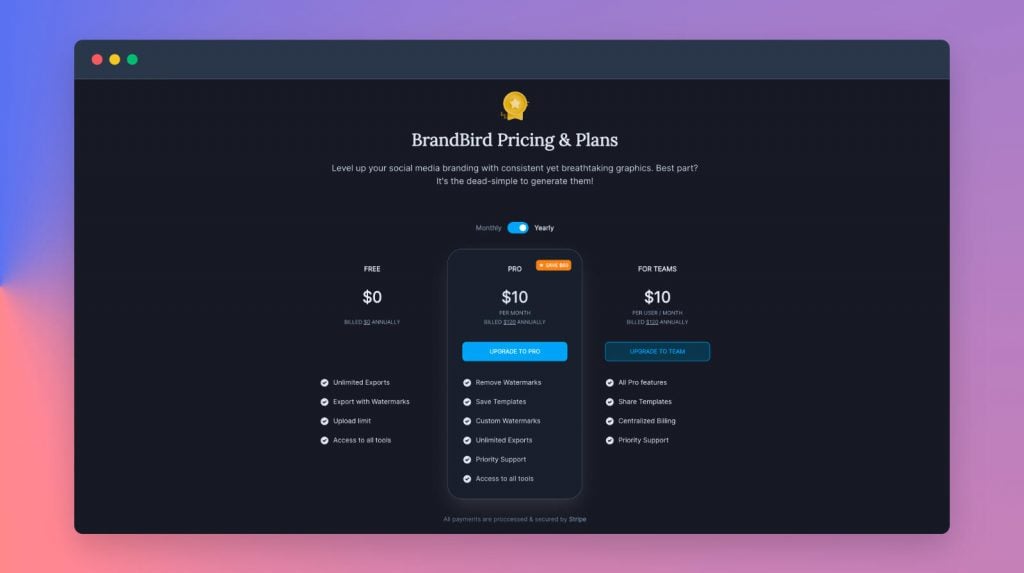
BrandBird has a three-tier pricing model: Free, Pro ($10/mth), and Teams ($10/mth per user).
The free tier is actually quite generous, as it still gives you unlimited exports.
It’s a great way to test out if the product fits well within your workflow.
If you choose to upgrade to Pro or Teams, the main benefits are:
🔖 BrandBird Coupon Code
Jim has kindly agreed to provide a special BrandBird discount for the NewPulse Labs community (you know how we do it here!).
Make sure to use this link, enter coupon code NEWPULSE20 at checkout, and save 20% on your order! It applies to all plans.
🔥 Do I recommend BrandBird?
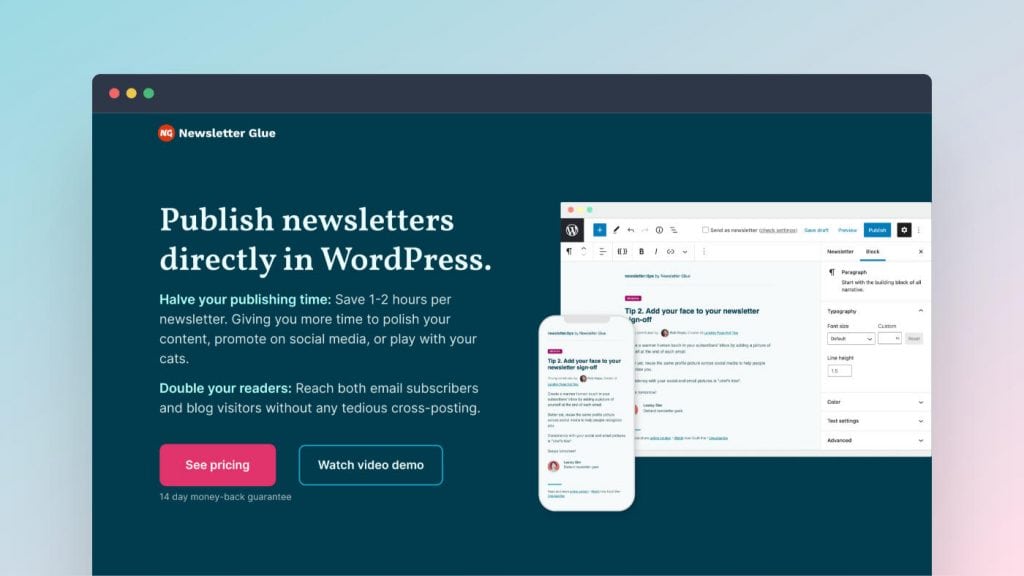
Every so often I come across a tool that drastically improves my workflow.
In the same way that Newsletter Glue helps me publish my weekly newsletter much faster, BrandBird helps me create my graphics 10x faster than before.
If you’re a blogger/content creator, product marketer, SaaS founder, or web designer, I’d highly recommend giving BrandBird a try.
It will help you create better visuals in a fraction of the time.
And people will even start complimenting you on how nice your content looks (I know this from experience).
☁️ How to Sign Up
You can sign up for BrandBird here.
Don’t forget that you can use coupon code NEWPULSE20 at checkout to save 20% on your order if you decide to go for the Pro version 🙂
Start Using BrandBird For Free
That’s all for this one.
Hopefully you found this BrandBird review helpful, and be sure to let me know in the comment section below if you ever decide to try it out.
Thanks for reading!